1. Background: Why NX-OS 9.4.5 Upgrade Was Necessary
In an enterprise customer environment running HPE SN6620C (Cisco MDS 9148T-based) 32Gb FC SAN switches, a firmware upgrade was requested to improve system stability.
The legacy 9.2.2 release had known issues such as environmental sensor polling false positives (e.g., Amber LED triggers) and potential BIOS timeout risks during ISSU. Consequently, we chose NX-OS 9.4(5), designated as the Recommended Release by both HPE and Cisco official advisories.
Because the data center was an isolated air-gapped network, external Internet access was blocked. We deployed Rebex Tiny SFTP/SCP Server on the engineer laptop to transfer firmware images directly via local management ports.
2. Environment & Prerequisites
| Item | Specification / Details | Field Rationale |
|---|---|---|
| Target Switch | HPE SN6620C (Cisco MDS 9148T OEM) | 32Gbps Fibre Channel (FC) SAN Switch |
| Current NX-OS Version | 9.2(2) | Existing operational release |
| Target NX-OS Version | 9.4(5) | HPE/Cisco Recommended Release |
| File Transfer Protocol | SCP (Secure Copy Protocol) | Laptop ↔ Switch Management Port direct connection |
| SCP Server Utility | Rebex Tiny SFTP/SCP Server | Lightweight portable SCP server without installation |
| Firmware Files | m9000-pkg2.9.4.5.bin, m9000-kickstart-pkg2.9.4.5.bin | System OS & Kickstart binary packages |
3. Step-by-Step Practical Upgrade Procedure
Step 1. Check Current OS Version and Switch Status
Before starting the upgrade, connect to the switch CLI and verify current running versions (show version) and module/port health (show module).
# Check current OS version and system info
show version

# Verify module status and port operational health
show module
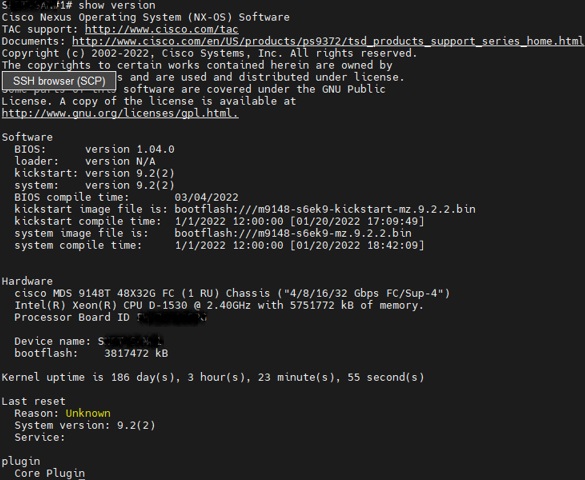
Step 1. Connect to Switch CLI and Verify Current 9.2.2 Version
Step 2. Download and Configure Rebex Tiny SCP Server
Set up Rebex Tiny SFTP/SCP Server, a lightweight portable tool optimized for air-gapped field operations.
- Download the portable executable and place it on the engineer laptop.
- Launch the utility, configure User/Password (e.g.,
scpuser/P@ssw0rd), and specify the directory containing the firmware binaries as theRoot Directory. - Click
Start Serverto immediately bind and activate the SCP listener.

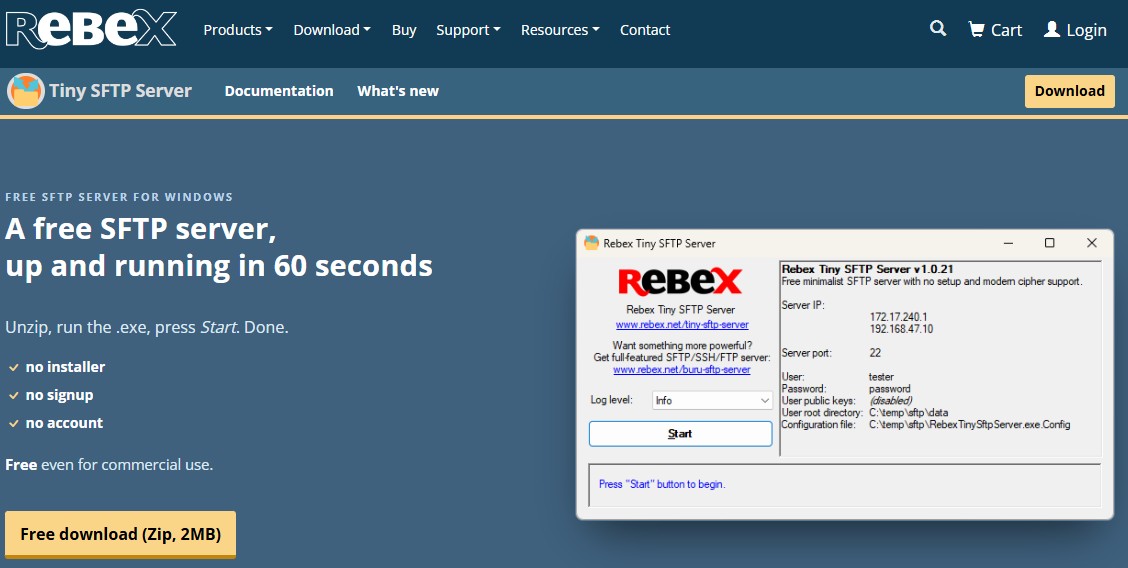
Step 2-1. Download Rebex Tiny SFTP/SCP Server Portable
Step 2-2. Rebex SFTP/SCP Server Main Window
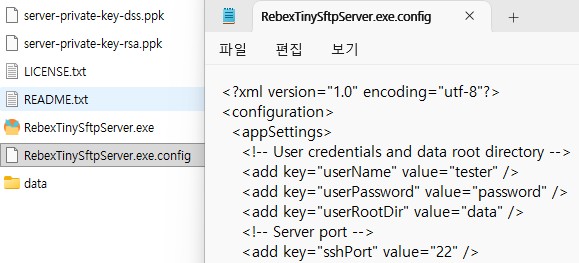
Step 2-3. Rebex User Account and Firmware Folder Configuration
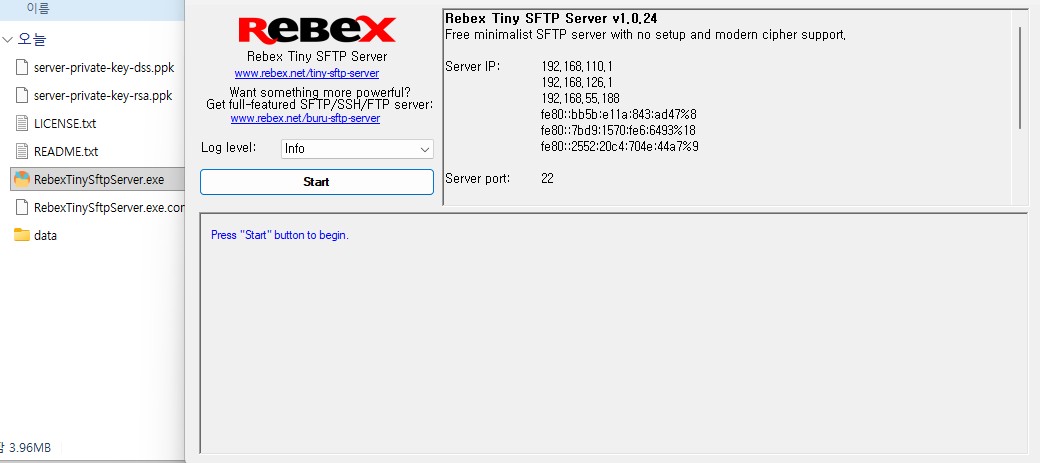
Step 2-4. Click Start Server to Activate SCP Service
Step 3. Transfer Firmware File via copy Command
Execute the copy scp: command on the switch CLI to pull the firmware binaries (m9000-pkg2.9.4.5.bin, m9000-kickstart-pkg2.9.4.5.bin) from the laptop to the local bootflash: area.
# Transfer firmware from laptop (SCP server) to bootflash: (System & Kickstart)
copy scp://scpuser@192.168.1.100/m9000-pkg2.9.4.5.bin bootflash: vrf management
copy scp://scpuser@192.168.1.100/m9000-kickstart-pkg2.9.4.5.bin bootflash: vrf management
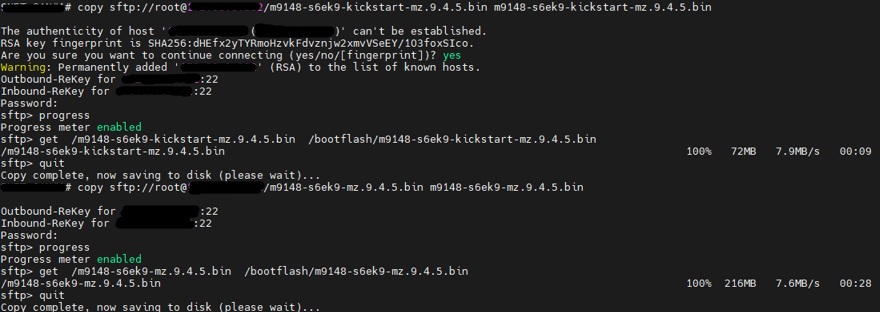
Step 3. Transfer Firmware to Switch bootflash using copy scp command
Step 4. Install Firmware and Run Pre-Upgrade Impact Checks via install all
Once the file transfer is complete, run install all specifying both system and kickstart images to perform image integrity checks, compatibility analysis, and flash the new OS.
# Start 9.4.5 OS firmware upgrade (Specify both System and Kickstart)
install all system bootflash:m9000-pkg2.9.4.5.bin kickstart bootflash:m9000-kickstart-pkg2.9.4.5.bin
During installation, the system verifies image checksums, applies patches across supervisor and controller modules, and performs an automatic reboot.

Step 4-1. Initiate Firmware Installation via install all Command
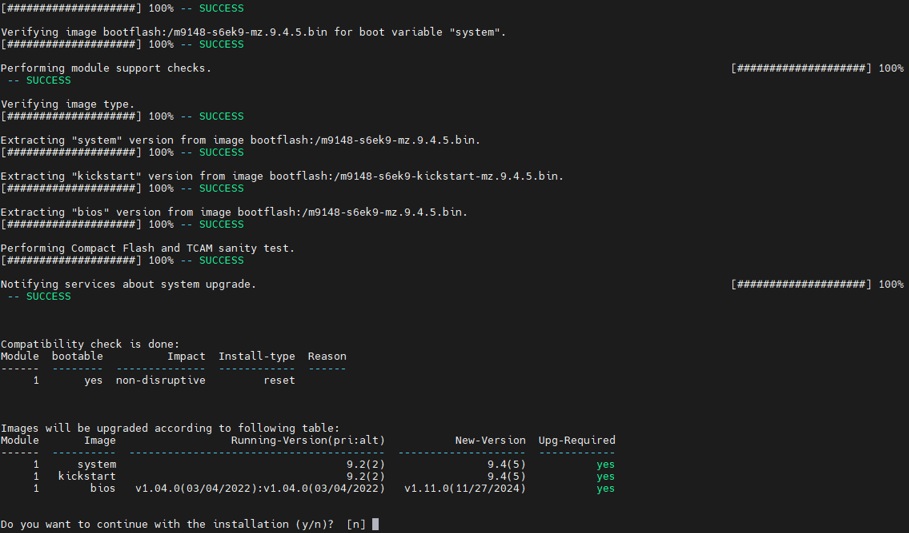
Step 4-2. Automatic Pre-Upgrade Compatibility & Impact Analysis
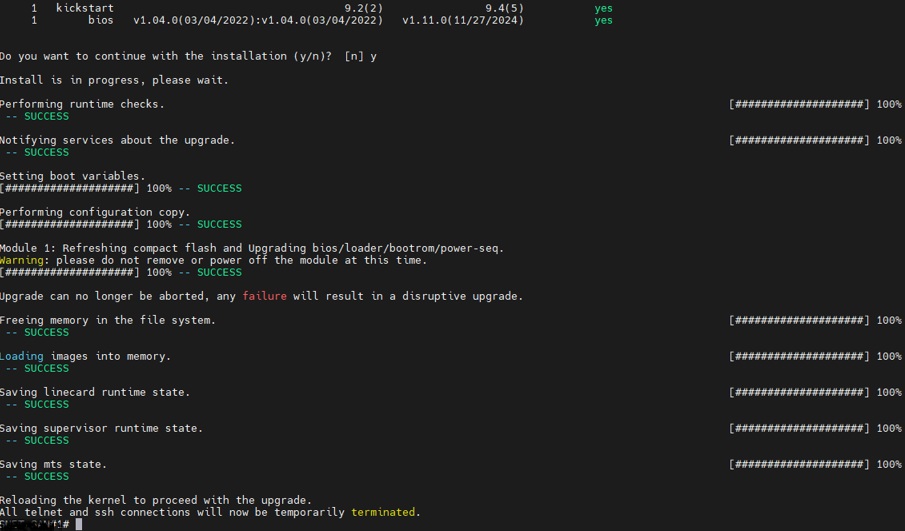
Step 4-3. Firmware Upgrade & Module Patch Writing in Progress
Step 5. Verify Successful Boot and NX-OS 9.4.5 Application
After the switch reboots, reconnect via CLI and verify that the target version (NX-OS 9.4.5) is active and running.
# Verify new OS version
show version
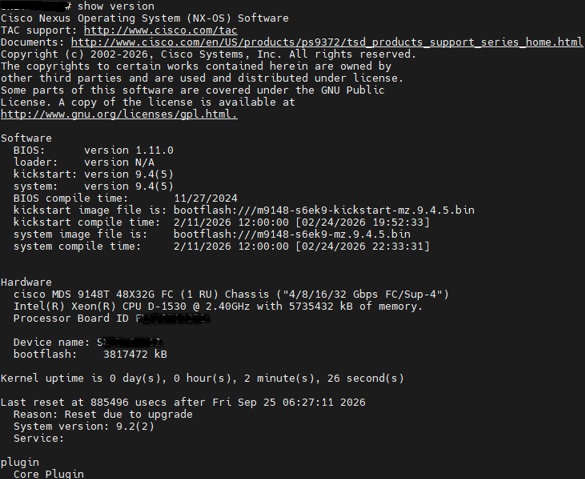
Step 5. Verify Normal Kernel/OS Boot and NX-OS 9.4.5 Upgrade Completion
Step 6. Clean Up bootflash Storage using delete Command
After completing the upgrade, delete the uploaded firmware binaries to prevent bootflash space exhaustion.
# Check bootflash directory space
dir bootflash:

# Remove uploaded 9.4.5 System and Kickstart binaries to free disk space
delete bootflash:m9000-pkg2.9.4.5.bin
delete bootflash:m9000-kickstart-pkg2.9.4.5.bin

# Verify reclaimed free space
dir bootflash:
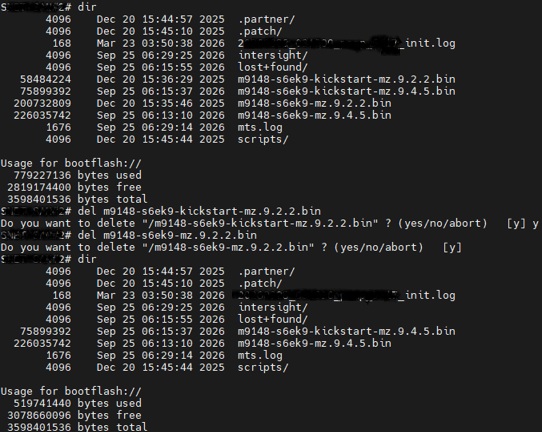
Step 6. Clean Up bootflash using delete Command Post-Upgrade
4. 🚨 Troubleshooting Notes (Field Realities)
Issue 1: Host key verification failed during SCP Transfer
- Error Message:
error: ssh connect failed / Host key verification failed - Root Cause: Cipher algorithm mismatch between the switch SSH client and laptop Rebex SCP server.
- Resolution:
# Explicitly allow key-exchange algorithm on switch CLI
switch(config)# ip ssh client algorithm key-exchange dh-group14-sha1
5. Verification Checklist
- OS Version:
show version➔ Confirmsystem: version 9.4(5). - SAN Port States:
show interface fc1/1-48 status➔ All operational FC ports remain Online. - bootflash Capacity:
dir bootflash:➔ Confirm reclaimed storage afterdelete.
6. Field Engineering Best Practices
- Always Clean Up bootflash:
MDS switch bootflash has finite capacity. Leaving large binary packages will cause disk full errors during subsequent maintenance or core dump generation.
7. Summary
- Core Workflow:
- Version Check (
show version) ➜ Rebex SCP Setup ➜ Transfer (copy scp:) ➜ Upgrade (install all) ➜ Verification ➜ Clean Up (delete). - Storage Management via bootflash Cleanup: To prevent future system issues and disk full errors during subsequent operations, always delete uploaded installer files using the
deletecommand after upgrading.
- Version Check (