1. Overview: Core Principles of HPE Alletra 9000 Firmware Upgrades
Serving enterprise mission-critical workloads, HPE Alletra 9060 (built on the Alletra 9000 / Primera architecture) storage arrays support online, non-disruptive firmware upgrades across dual or quad-controller nodes.
The paramount prerequisite for any Alletra 9000 OS upgrade is the advance preparation of the latest Upgrade Tool (UT). Before executing the main OS firmware update, the matching Upgrade Tool package must be loaded into the storage array. This ensures accurate pre-upgrade readiness checks, scripts validation, and seamless rolling controller reboot sequences.
This guide walks through the complete upgrade procedure from OS 9.6.5 to OS 9.6.30 (Extended Support Release) on an active HPE Alletra 9060 system, highlighting critical field engineering verification checkpoints.
2. Pre-Upgrade Preparation & Package Acquisition
2.1. Downloading Required Packages
Firmware binaries and tooling for HPE Alletra 9000 and Primera arrays are sourced through the official licensing portal:
- Log in to the HPE Enterprise License Portal (My HPE Software Center).
- Navigate to Software ➔ Input your contract SAID or array identifier.
- Download the following components:
- Latest Upgrade Tool Package:
Upgrade Tool 80 (build 260625)or newer. - Target OS Firmware Package:
HPE Alletra 9000 OS 9.6.30.xx(tar/iso archive).
- Latest Upgrade Tool Package:
2.2. Pre-Flight Verification Checklist
- Host Multipath Redundancy: Ensure redundant active I/O paths across all 15+ connected host initiators before initiating rolling controller reboots.
- Array Hardware & Alert Status: Verify all controller nodes, power modules, and drive enclosures show healthy status with zero active unacknowledged alerts (
New alerts: 0). - Note on Remote Copy & Schedules: In modern HPE Alletra/Primera OS architectures, Remote Copy sessions and internal schedule windows are engineered for non-disruptive rolling failovers. Unless explicitly mandated by a specific Release Note or Customer Advisory, manual suspension of replication or backup schedules is not required.
3. Step-by-Step Non-Disruptive Upgrade Procedure
Step 1. Initial Dashboard & Health Inspection
Log in to the web console and inspect system alerts (New alerts: 0), usable capacity, and online host connectivity. Under System ➔ Software, confirm the baseline firmware version (9.6.5) and array model specifications.
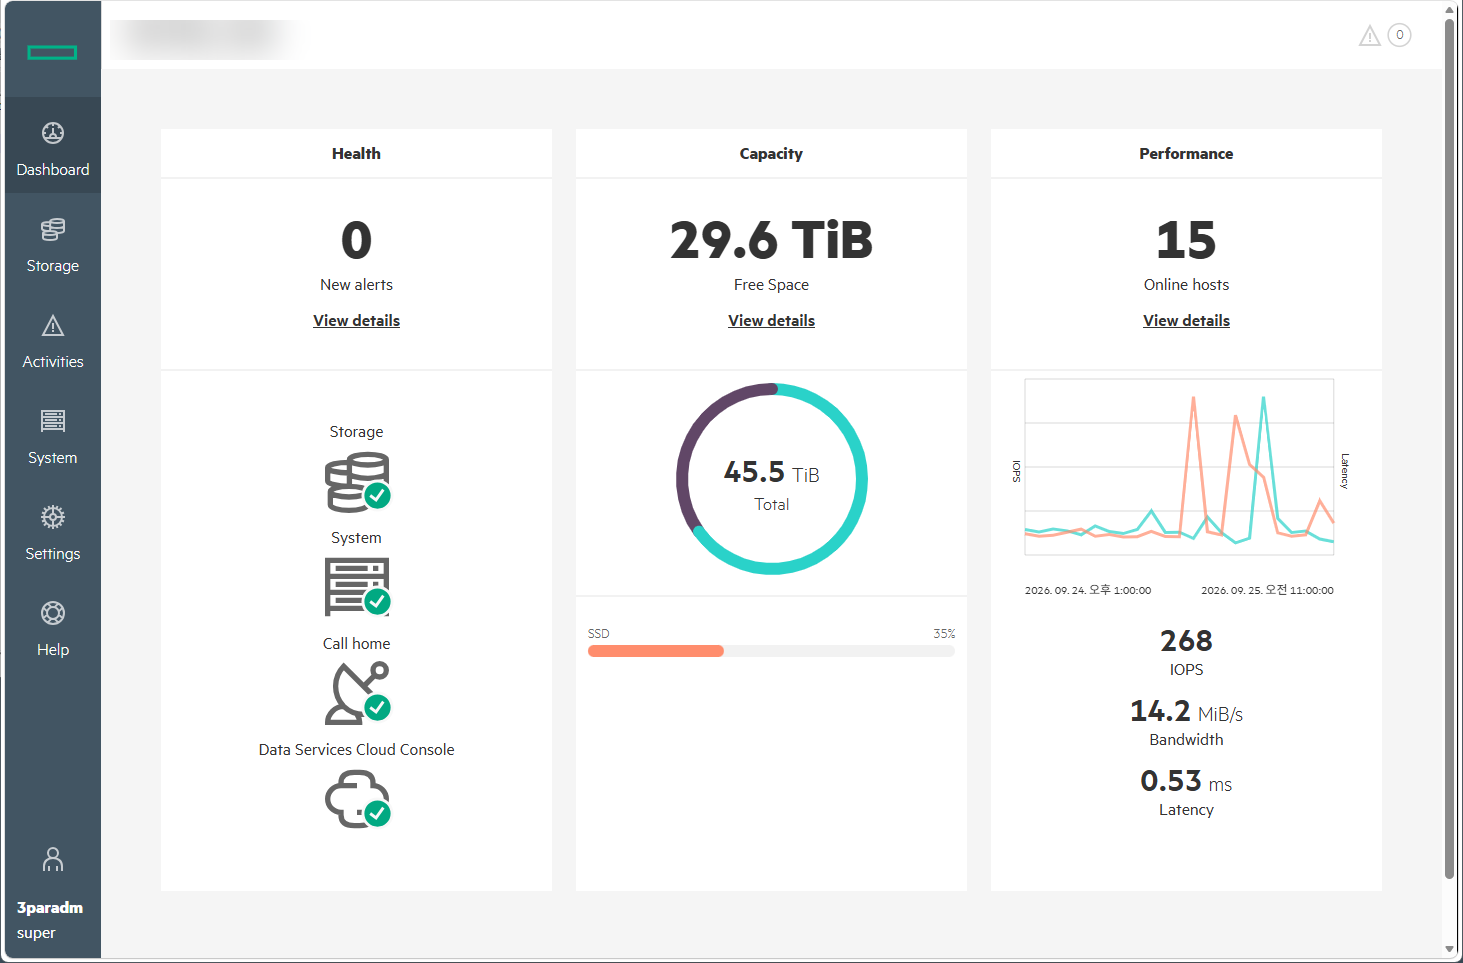
Figure 1. Pre-upgrade Dashboard - Health status, capacity metrics, and active hosts
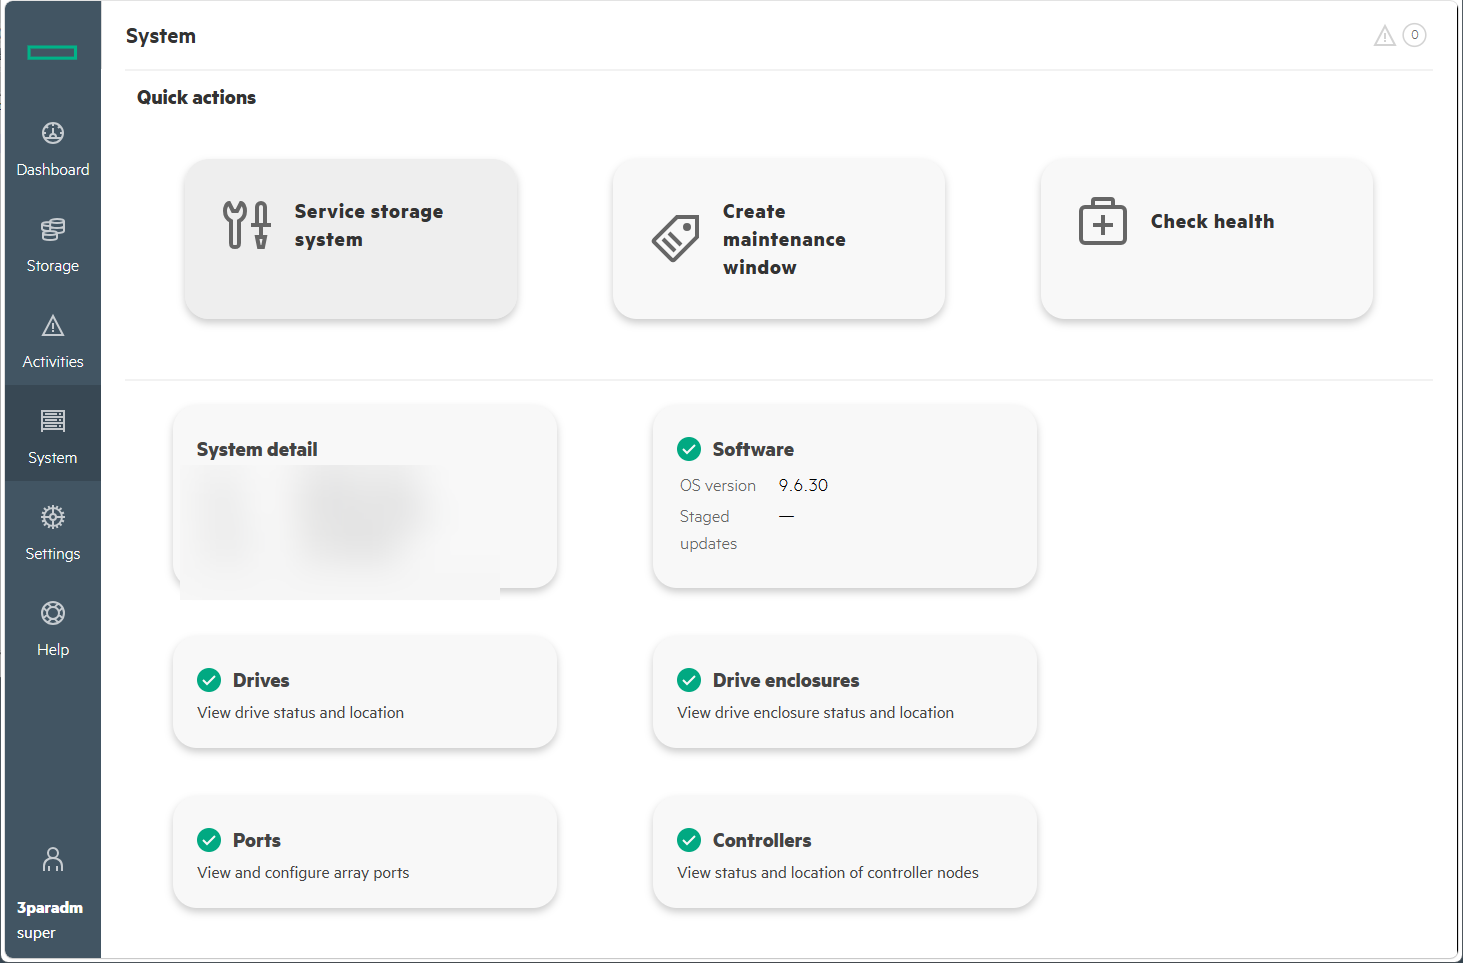
Figure 2. System Overview - Baseline firmware version (9.6.5) and hardware summary
Step 2. Loading Upgrade Tool and OS 9.6.30 Update Packages
From the right-hand Actions menu, click Load an update package . Upload the downloadedUpgrade Tool (UT 80) and OS 9.6.30 package to the array.
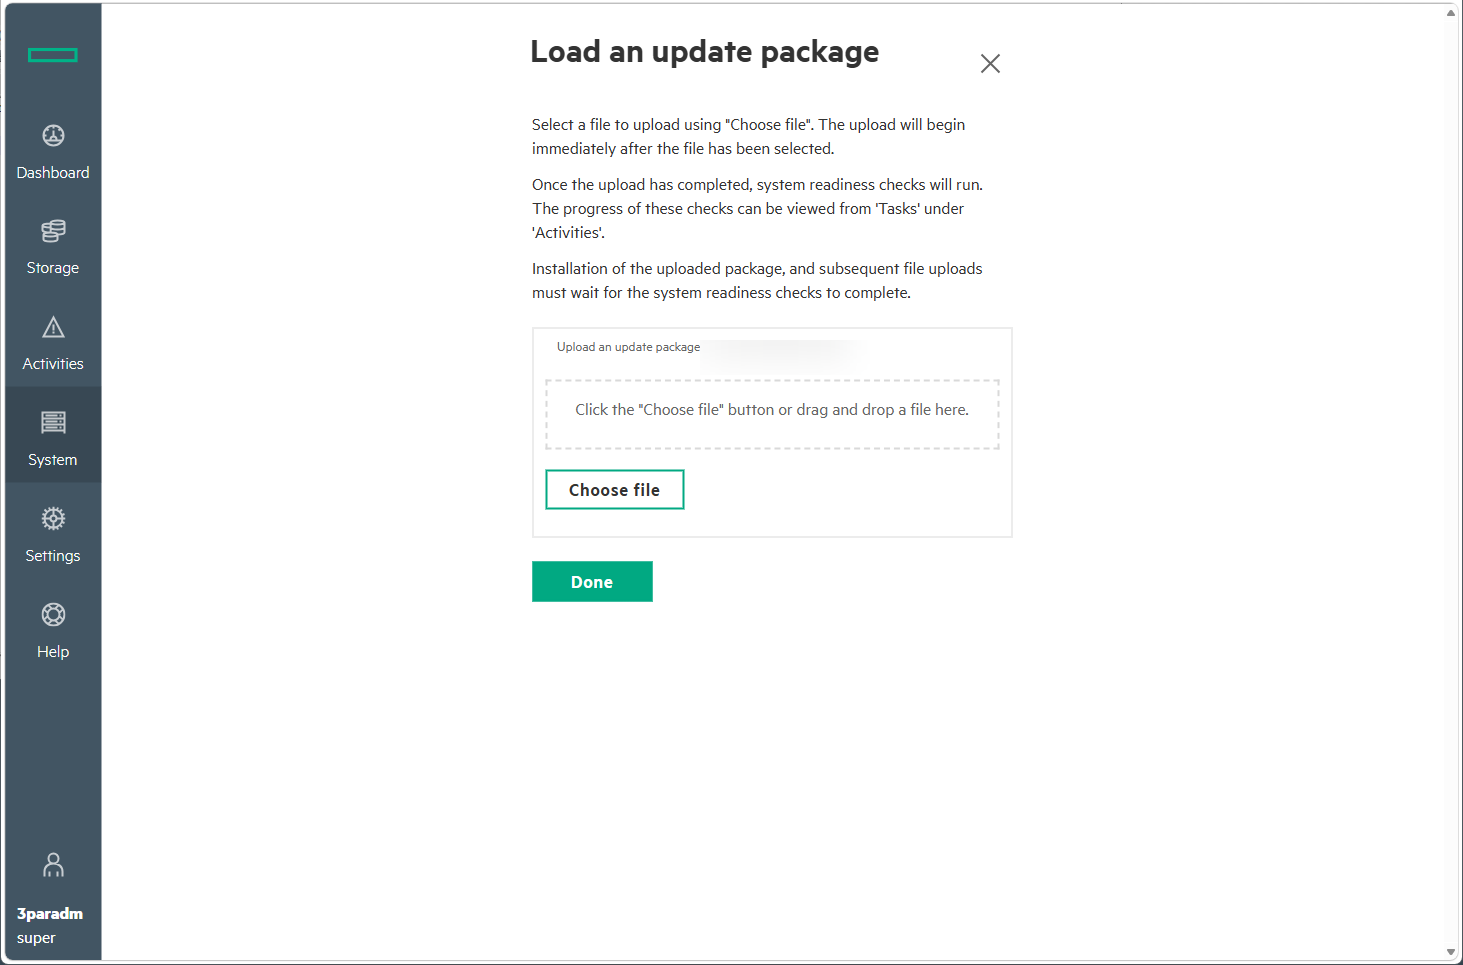
Figure 3. Load an update package - Selecting and uploading firmware packages
Step 3. Pre-Upgrade Readiness Checks & Warning Acknowledgment
Prior to initiating the live upgrade, the system executes automated Readiness Checks to evaluate overall cluster safety and prerequisite compliance.
Port Topology Warning Review and Acknowledgment
The readiness scan may report a warning on Check Port Topology Consistency. This occurs due to planned fabric topology differences across target ports (0:3:1, 0:3:2, 1:3:1, 1:3:2). Confirm that this matches your planned SAN configuration.
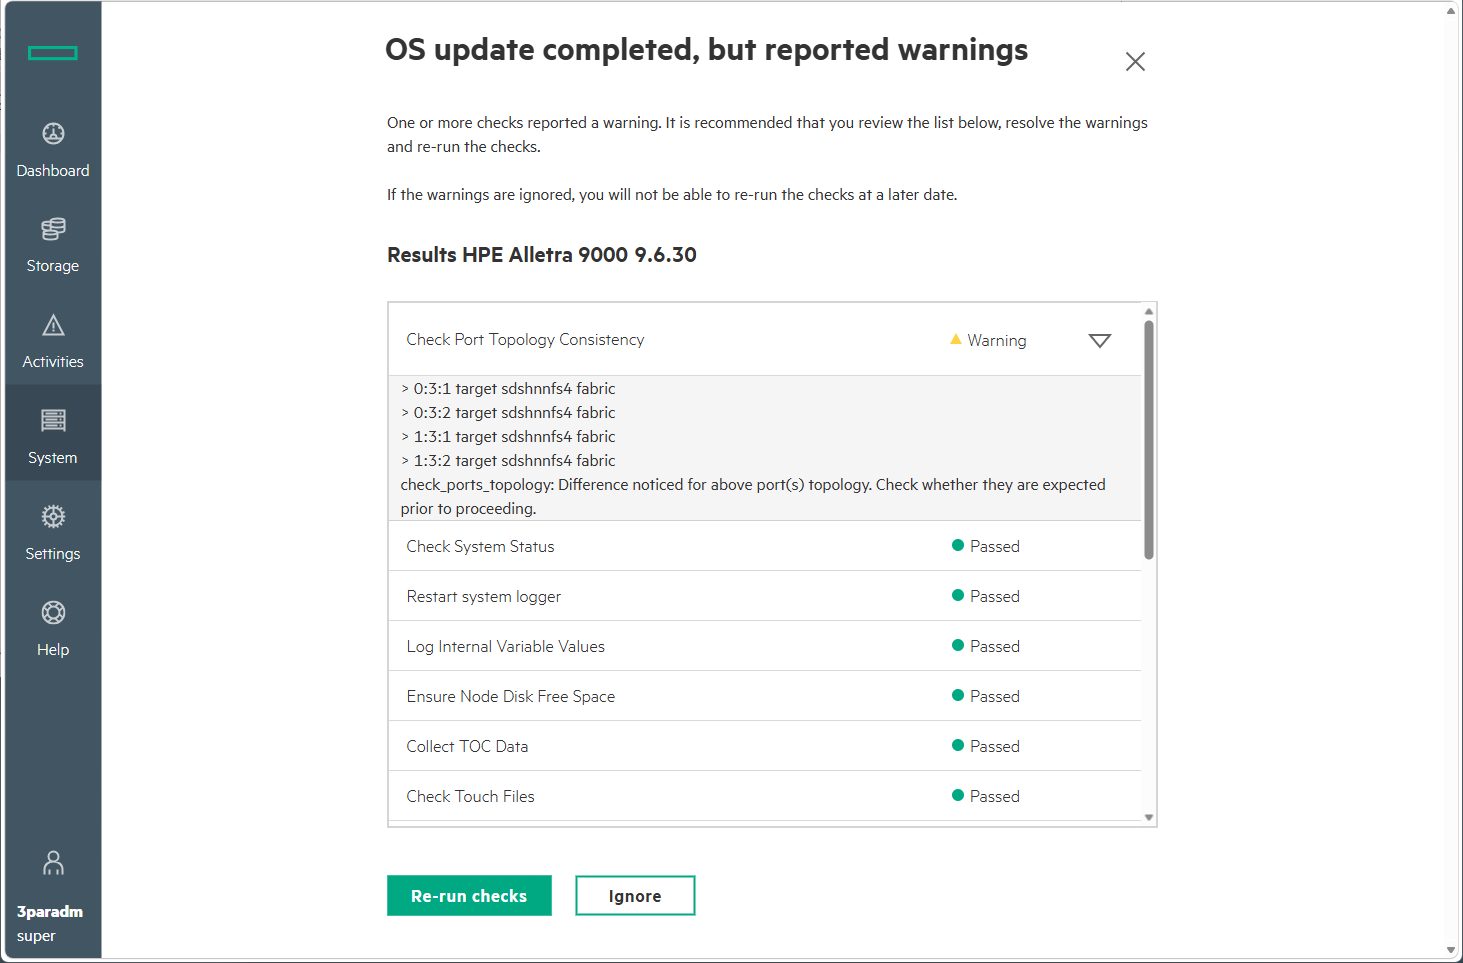
Figure 4. Pre-upgrade Readiness Checks - Detailed review of port topology consistency warning
After confirming all primary readiness checks (PD/Chunklets, LD State, IOCTLs, Host Path Consistency) show Passed, open the Ignore checks dialog, review the prompt, and select Yes, ignore to pass pre-checks and proceed.
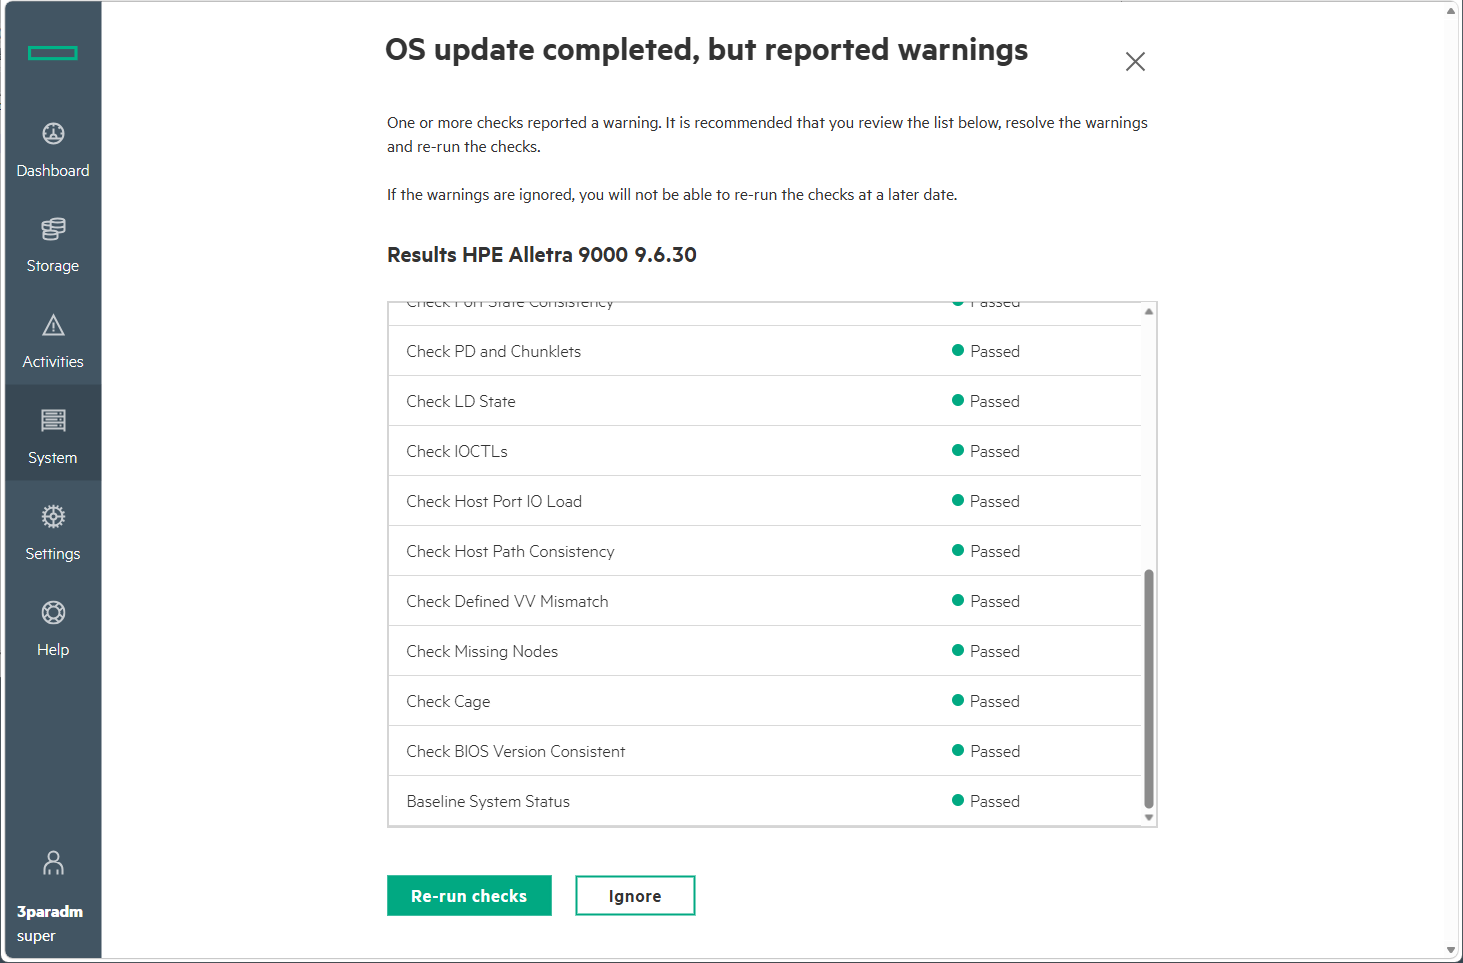
Figure 5. Pre-upgrade Readiness Checks - Physical disks, logical disks, and host paths verified passed
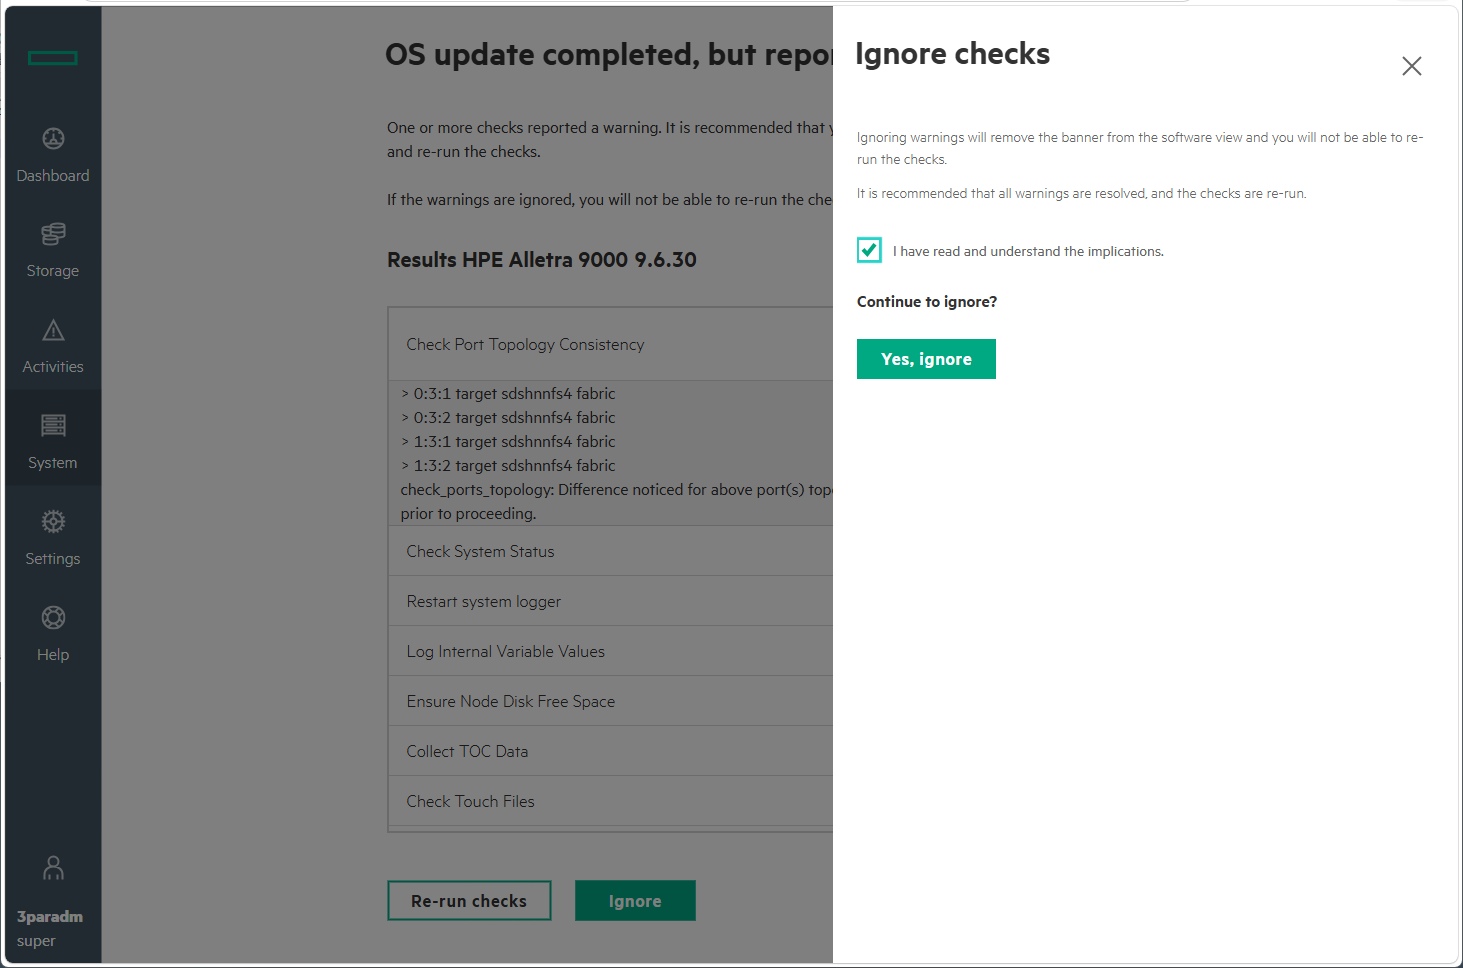
Figure 6. Ignore checks dialog - Acknowledging warning to proceed
Step 4. Executing the Non-Disruptive Rolling Node Upgrade
Once pre-checks are cleared, start the upgrade. The automated Upgrade Tool 80 engine executes pre-update scripts and installs the base OS filesystem onto the secondary partition.
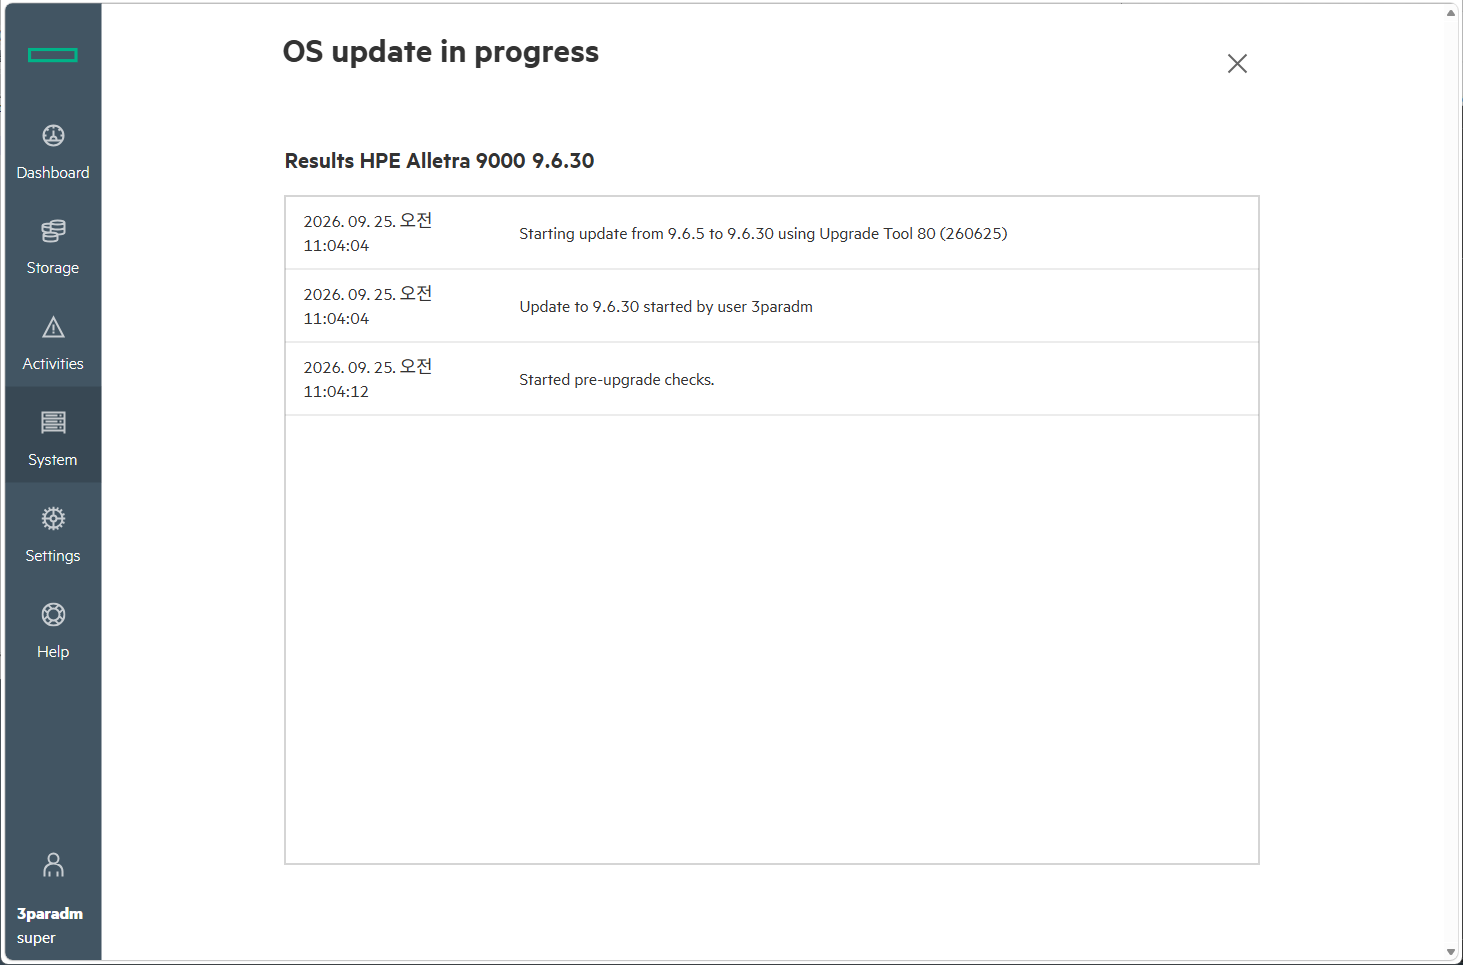
Figure 7. OS update in progress - Upgrade Tool 80 executing pre-update scripts
Node 0 Upgrade & Reboot Sequence
After base filesystem staging, Node 0 leaves the cluster (11:13:20) to perform a full reboot into the new OS (9.6.30). Host I/O seamlessly paths through active Node 1. Once rebooted, Node 0 automatically rejoins the cluster (11:22:13).
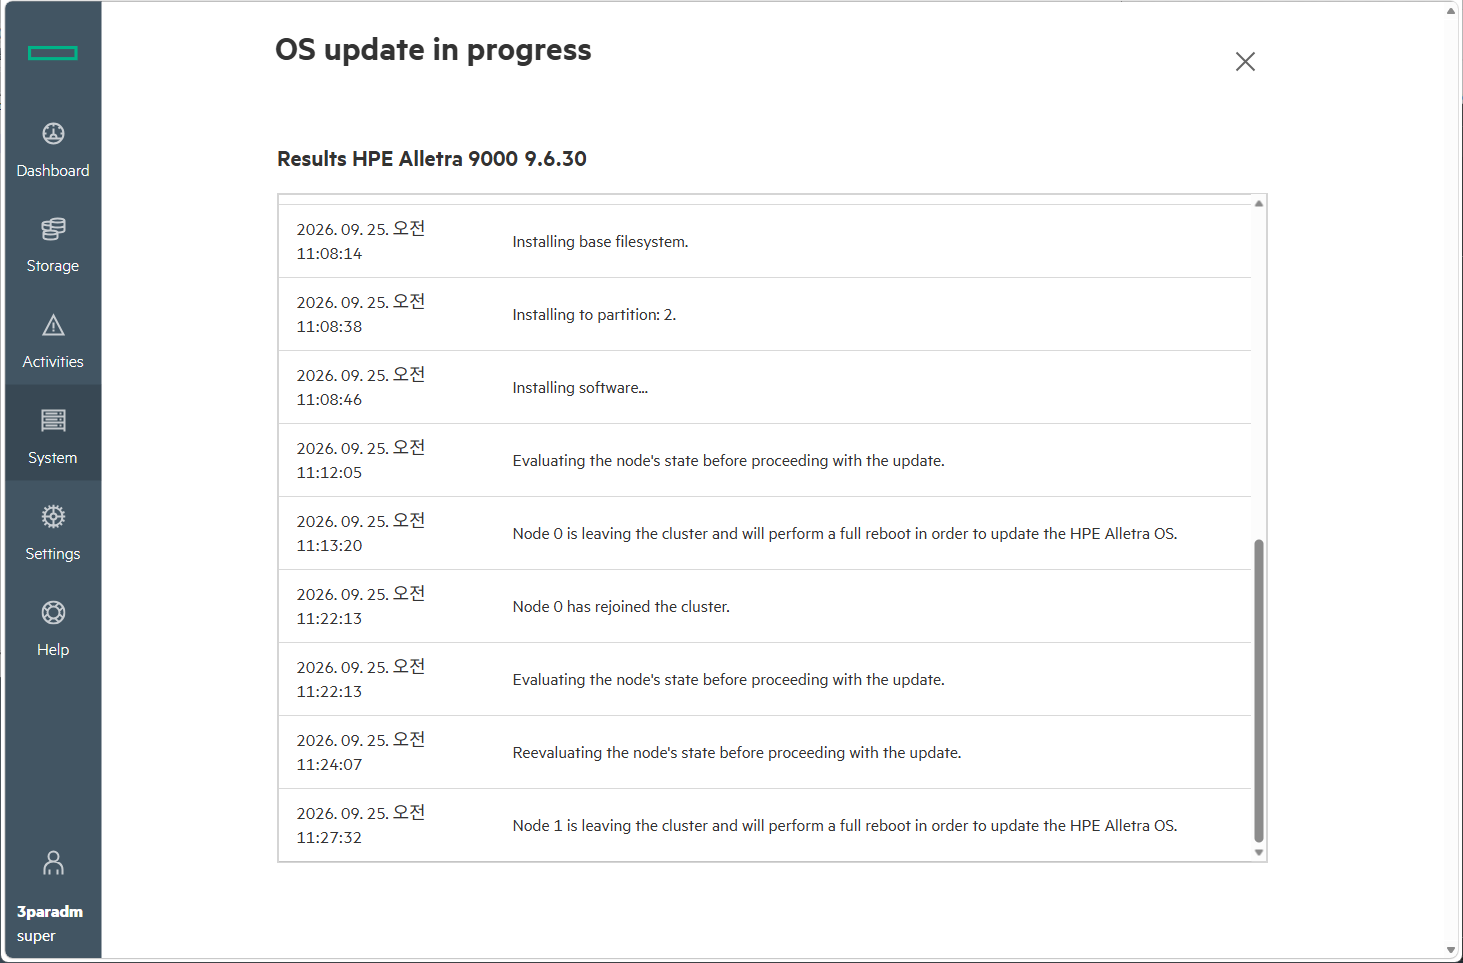
Figure 8. Node 0 OS update - Cluster exit, reboot into 9.6.30, and successful rejoin
💡 Field Engineering Note (Management Failover):
When the active master controller node reboots, the web management session fails over to the peer node. An overlay modal (Update in progress 16%) may briefly appear. Do not refresh or close the browser; the session recovers automatically.
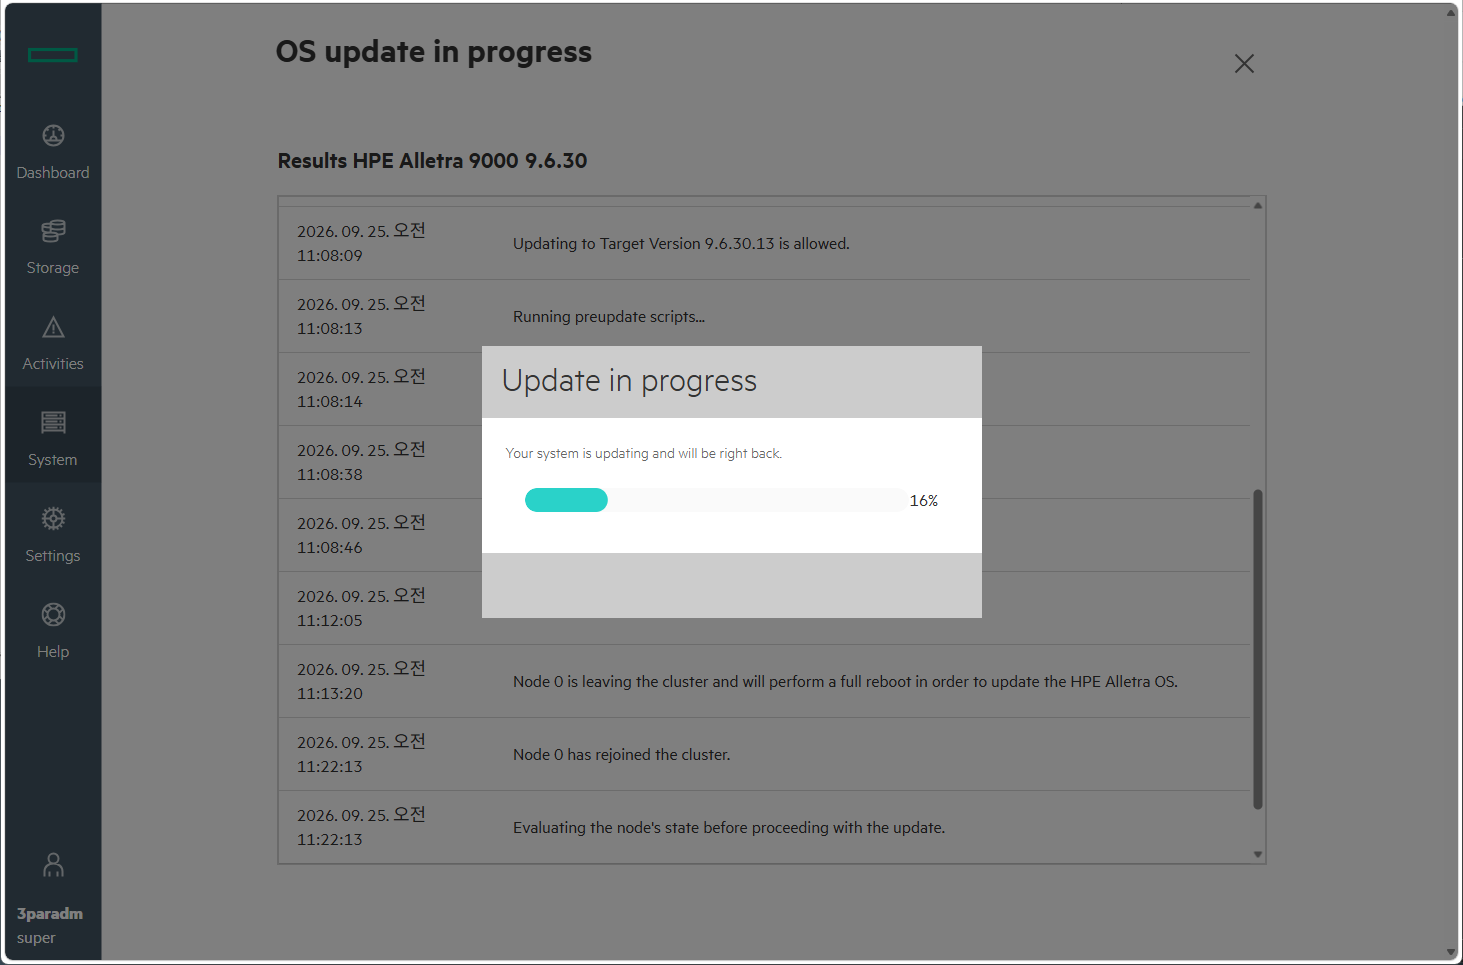
Figure 9. Management console failover progress dialog during node reboot
Step 5. Node 1 Rolling Upgrade & Web UI Reconnection
With Node 0 confirmed healthy and resynchronized, Node 1 leaves the cluster to reboot into OS 9.6.30 (11:27:32).
Reconnecting to the web management UI during the Node 1 reboot reveals the main Software view displaying an active **Maintenance Mode **notification banner and the overall installation progress (Installing HPE Alletra 9000 9.6.30: 69%).
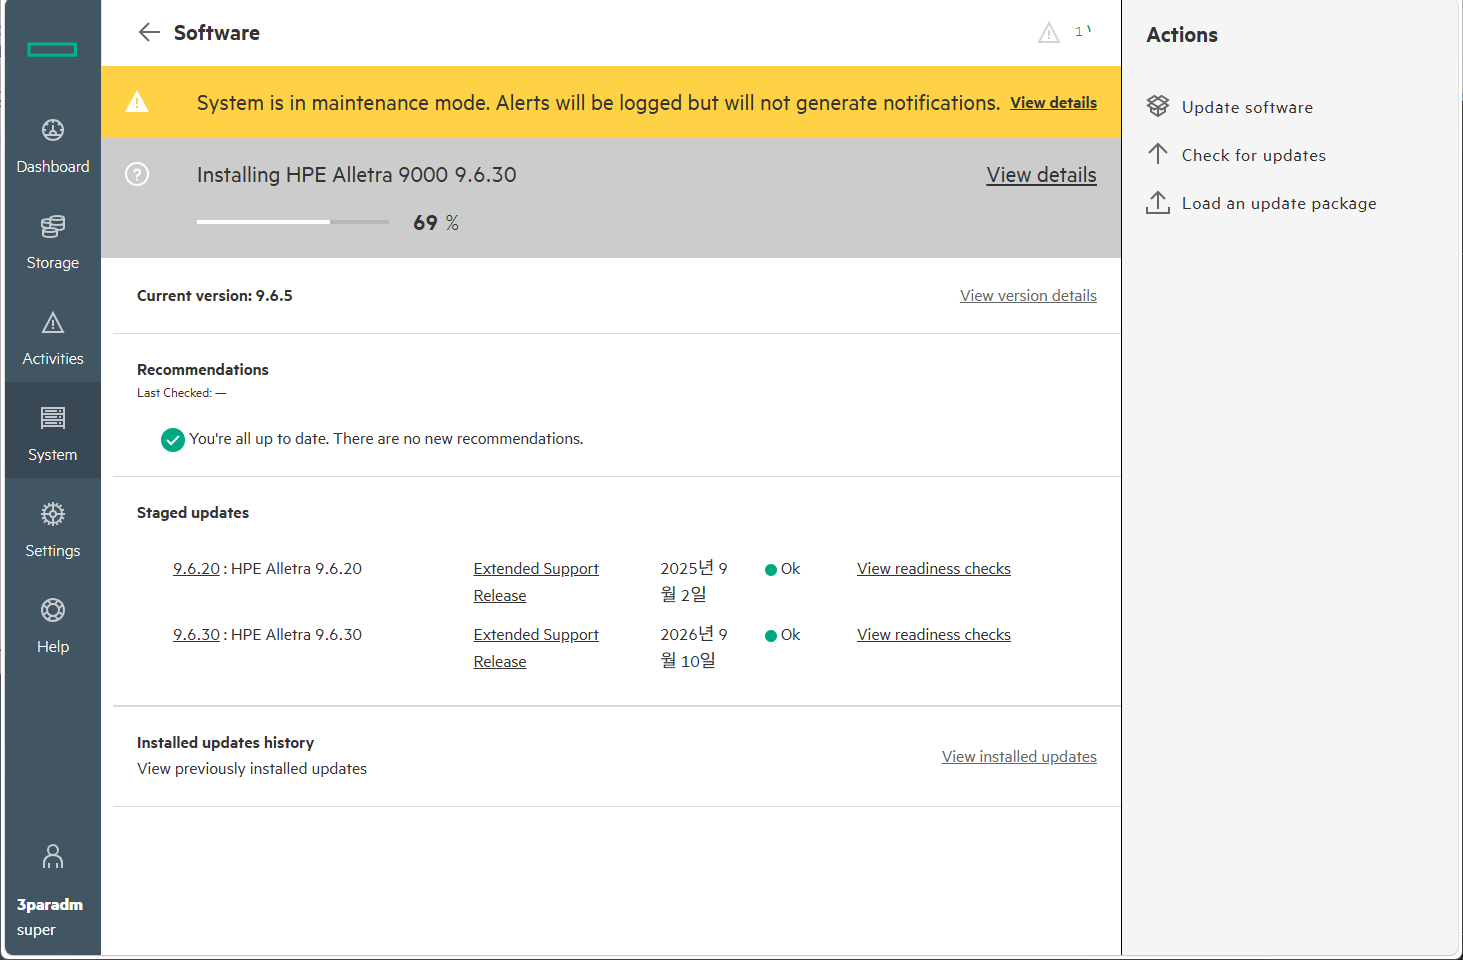
Figure 10. Web UI reconnection during Node 1 reboot - Installation progress (69%) and maintenance mode banner
Once Node 1 finishes rebooting and rejoins the cluster (11:35:16), both nodes are synchronized at 9.6.30, and the automated post-upgrade validation phase commences (11:41:23).
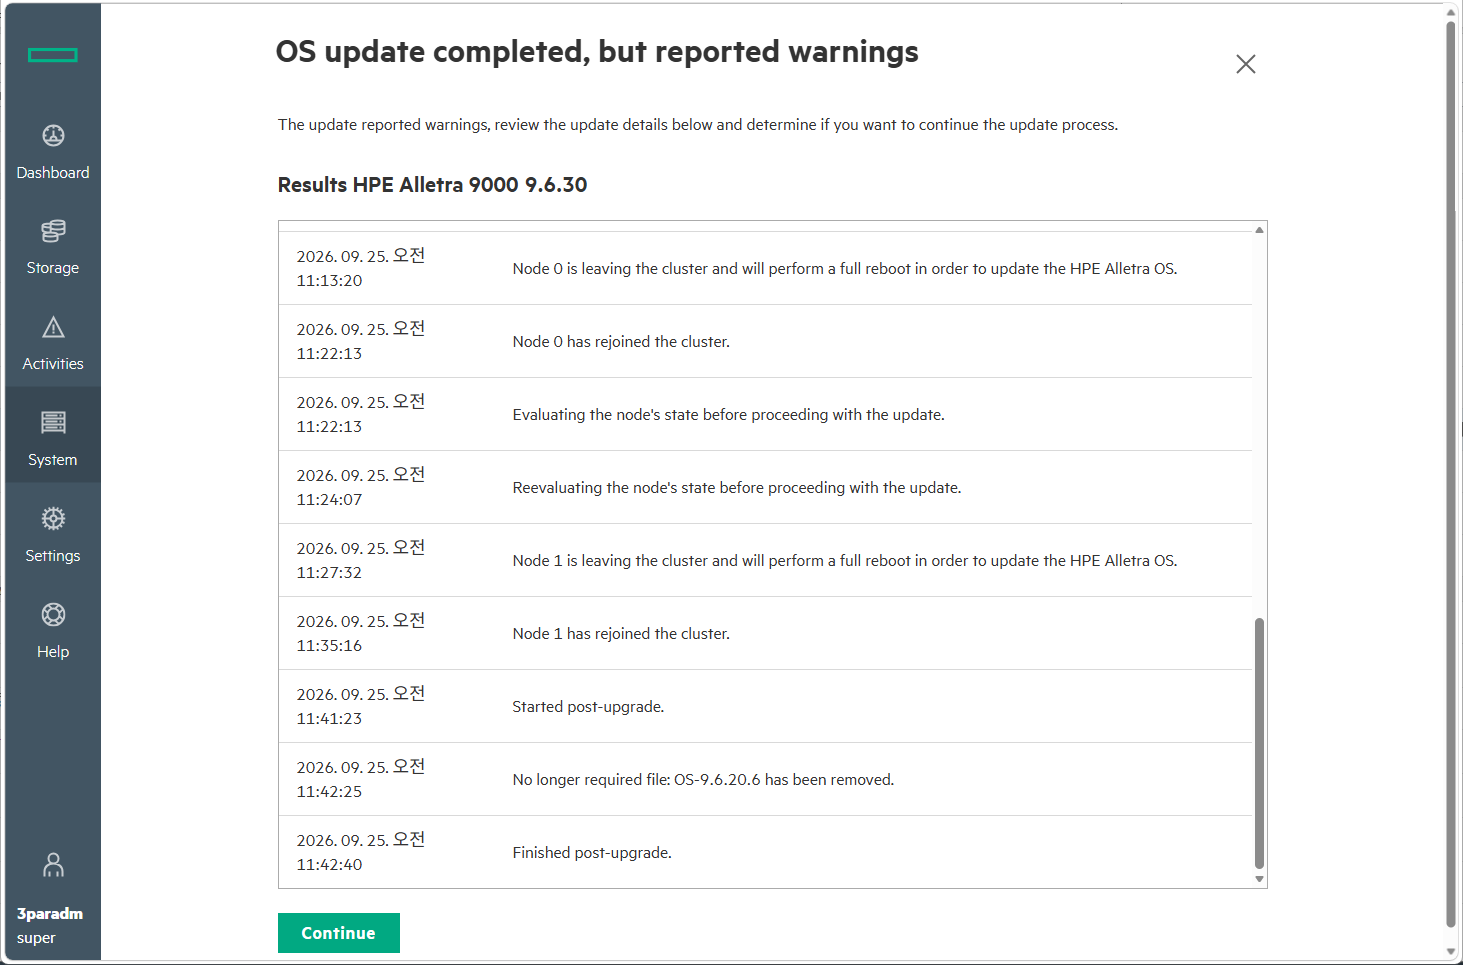
Figure 11. Node 1 OS update - Reboot, cluster rejoin, and post-upgrade initiation
Step 6. Post-Upgrade Verification & Final Version Confirmation
The system purges deprecated staging packages (OS-9.6.20.6). Review the final prompt in the Continue update software dialog and click Yes, continue (11:49:45 No issues reported).
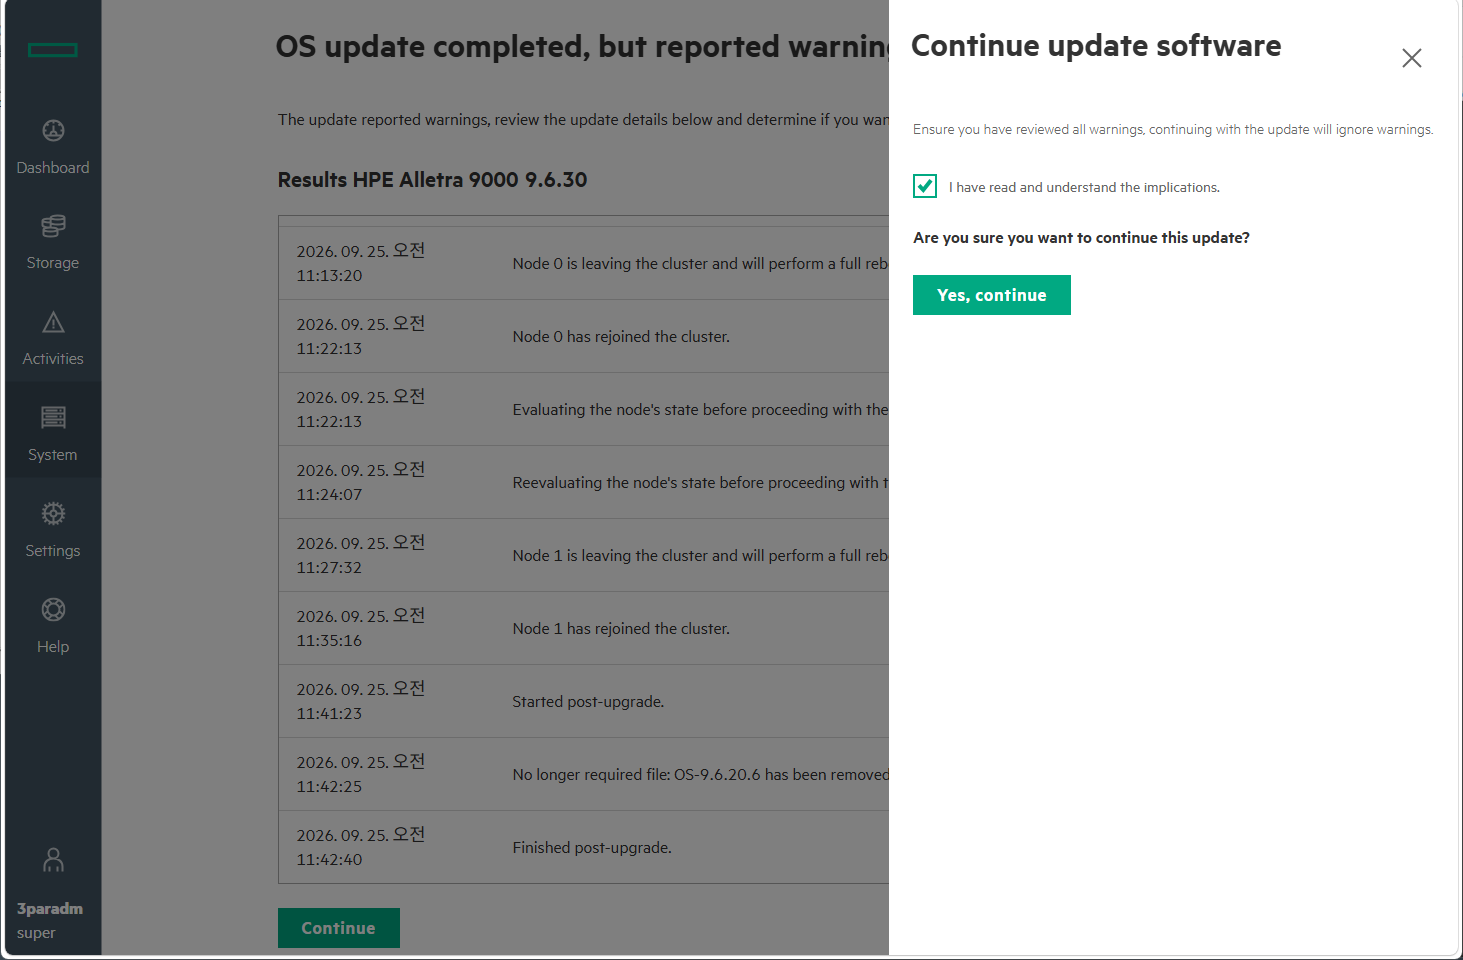
Figure 12. Continue update software - Post-upgrade confirmation dialog
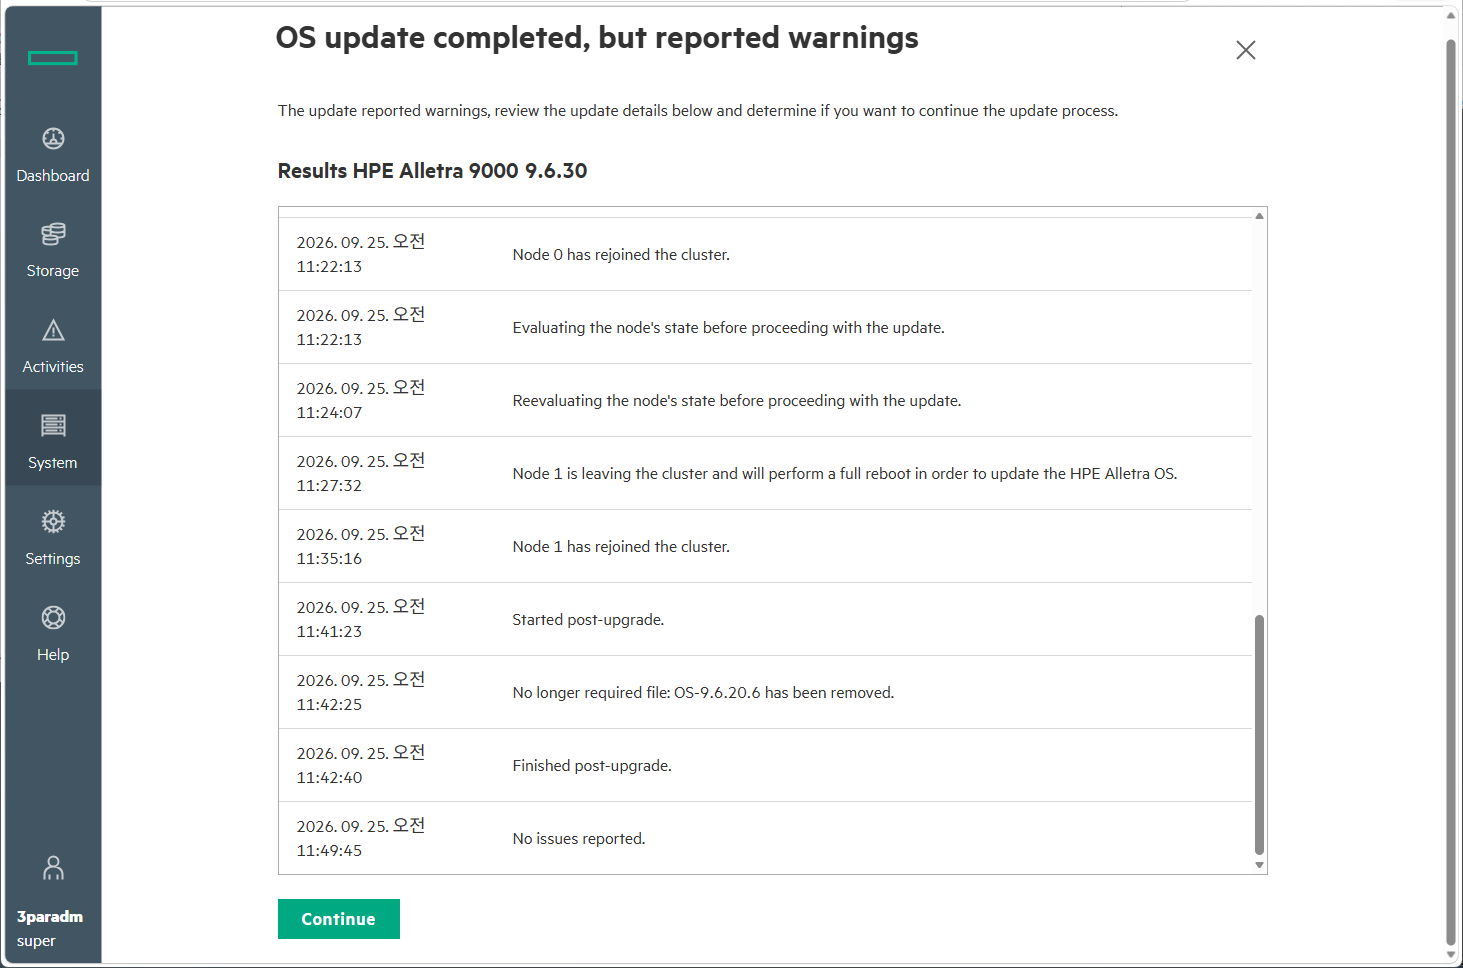
Figure 13. Post-upgrade completion - Verification log reporting no issues
In the Software console, verify that Current version: 9.6.30 is displayed with You're all up to date. Maintenance mode clears automatically, concluding the non-disruptive update.
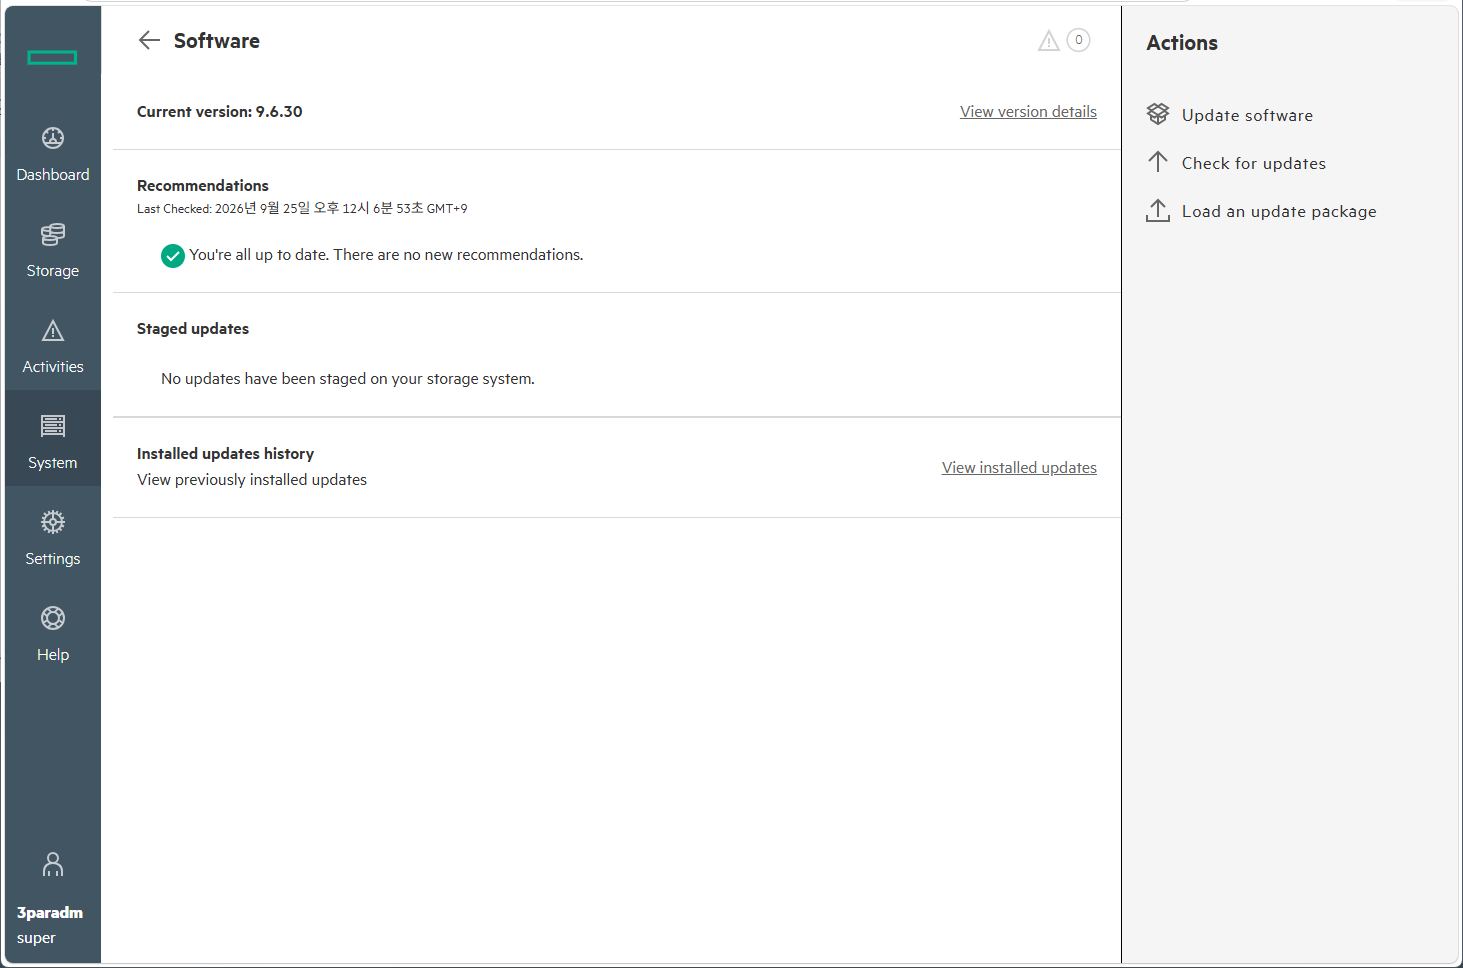
Figure 14. Final Software view - OS 9.6.30 verified active and system fully healthy
4. Key Engineering Takeaways
| Dimension | Critical Focus Item | Field Engineering Recommendation |
|---|---|---|
| Upgrade Tool (UT) | Version Compatibility | Always stage the latest Upgrade Tool release prior to running the main OS update. |
| Software Acquisition | Official Licensing Portal | Source binaries from the HPE Enterprise License Portal under valid support entitlements (SAID). |
| High Availability | Host Multipathing | Ensure all host initiators maintain redundant active paths before initiating rolling reboots. |
| Warning Handling | Port Topology Nuances | Investigate all readiness check warnings; acknowledge only verified, deliberate fabric configurations. |
5. Summary & Technical Support Advisory
Upgrading an HPE Alletra 9060 array to OS 9.6.30 delivers critical security patches and enterprise controller stability. Supported by rigorous pre-checks and the proper Upgrade Tool, the upgrade proceeds with 100% online availability.
⚠️ Field Support Notice:
HPE Alletra 9000 storage arrays manage tier-1 mission-critical enterprise data. If you require architecture validation, fabric topology review, or tailored firmware guidance, always consult HPE Pointnext Services or authorized partner engineers.